Create the cause list
- On the home screen, select the date and wait for its cases to load.
- Tap Cause List in the top toolbar.
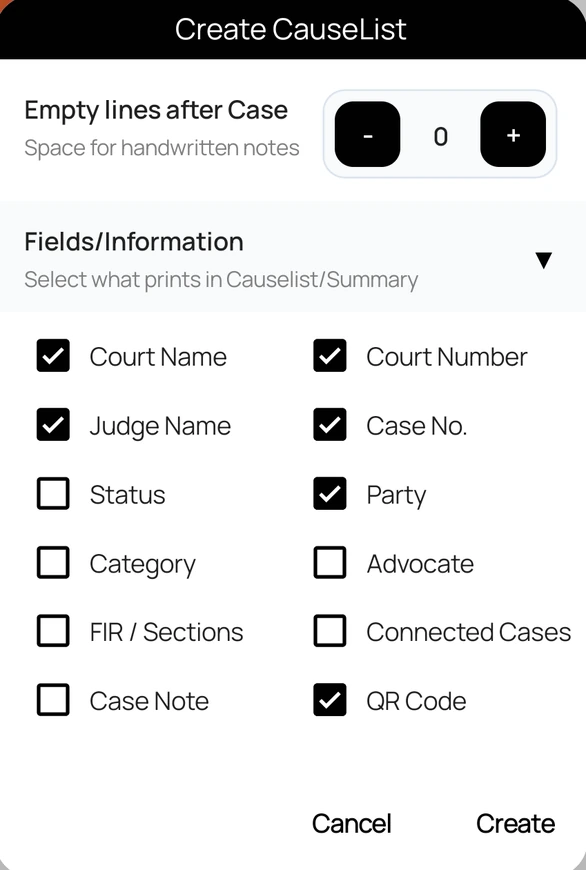
- In Create CauseList, use − and + under Empty lines after Case to leave space for handwritten notes.
- Expand Fields/Information and tick what should print: Court Name, Court Number, Judge Name, Case No., Party, Status, Category, Advocate, FIR / Sections, Connected Cases, Case Note, and QR Code.
- Tap Create, then save, print, or share the PDF.
Tick QR Code to print each case's QR code, so it can be scanned later to open or add the case.
Good to know
- Cause List is available only after the cases for the date have loaded.
- "No cases available for Cause List.": no cases from your folders are listed for that date. Try another date.
- Use Filter first if you want the list to include only some cases.